|
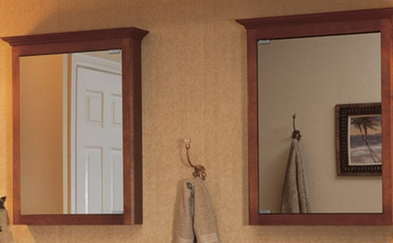
There are two basic kinds of medicine cabinets, those that hang on the wall, called "surface-mounted" cabinets, and those that are recessed into the wall. The hanging kind comes with installation instructions, but even if it does not, installations generally a matter of measuring where nails or screws should go, drilling a couple of pilot holes, and hanging the unit up. Recessed medicine cabinets are a bit trickier. When you cut the wallboard or plaster and lather in a kitchen or bathroom area, you may encounter wiring, water pipes, vents, structural framing for windows or pocket doors, or heat and air ducts. However, if you do not run into any of these obstacles, installing a recessed medicine cabinet is fairly simple. Studs are placed at 16 or 24 inch intervals, center to center. Thus, the actual space between the studs is 14 inches or 22.5 inches. And these are exactly the widths of many medicine cabinets.
Tools: drill, utility knife, circular, reciprocating, hammer level, plumb line, screwdriver Supplies: common nails, screws, 2 by 4s to size 1. To install a standard-size medicine cabinet, determine where you want to place it, and locate the nearest studs. Measure the unit, and mark the measurements on the wall. Turn off your electricity to avoid cutting hidden live wires and cut out the section. Toenail two sections of 2 by 4 to fit horizontally between the studs and flush with the opening you've cut. 2. To install a larger unit, start by determining where you want to place the cabinets, and locate the studs closes to the outside edge. Measure the unit and add 1/2 inches top and bottom to accomodate 2 by 4 headers. 3. Cut any obstructing studs. Then cut and install the top header. To provide maximum support for the cut stud in a hearing wall, use a double header. Two flat 2 by 4s are sufficient if there is no more than one cut stud to work with. Toenail in place and check with a level. 4. Next, install cripples. Measure the distance from the header to the floor, cut two 2 by 4s to length and nail them to the two outside studs on the wall. 5. Install the bottom support between the cripples. If you're installing a mid-size cabinet, add a filler piece and blocking to create the correctly sized opening for your cabinet. If you're centering the cabinet in the space, follow the procedure for both sides. Install the cabinet according to the manufacturer's instructions, plumb and screw the cabinet, within its frame, hang the doors and install hardware. Then patch the wall. Comments are closed.
|
Remodeling Tip Blog
Archives
June 2024
Recent bathroom and shower articles: Basin Buying Tips | Toilets and Bidets | Shower Choices and Styles | Sink Taps and Fittings | Choosing Flooring & Lights | Flooring tips for bathrooms | Bathroom Wall Tips | Designing With Tile | Dimensioned Stone | Piping Tips | Bathroom Lighting | Learn More About Hiring Bathroom Remodeling Contractors | Bathtub Removal How-To | Japanese Bathroom Tips | Building Contractors vs. Remodeling Contractors | Removing Shower Walls | Mosaic Tile Installation | Cabinet Ideas | Bathroom Fixtures | Tampa Shower Tips | Boston Shower Remodeling | Seattle Shower Remodeling | Sacramento Shower Remodeling | San Antonio Shower Remodeling | San Jose Shower Remodeling |
Indianapolis | Jacksonville | Staten Island Shower Remodeling | Colleyville Kitchen Remodelers | Provo Bathroom Remodeling | Charlotte | Fairview TX Tree Trimming | Categories |


 RSS Feed
