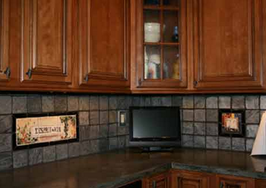
 accent tile example - click to enlarge Decorative or accent tiles - around a door or window frame, along a roof line, or stair risers, or behind a wood-burning stove - add architectural interest to a kitchen. Accent tiles on walls (left) can be installed in two ways: On top of an existing wall in the same manner as any installation, or flush with the wall. You can install accent tiles on top of any sound, smooth, clean, flat surface. Organic mastic is a good choie of adhesive for this type of work. To install accent tiles on an uneven surface - an exterior stucco wall, for example - first glue or screw a piece of exterior grade plywood, cut to size, to the wall. Then attach tiles to plywood using standard thin-setting techniques for applying tile to a wall. To install accent tiles flush with an existing wall, rout out the finish wall materials behind the intended location of the tiles attach tiles with thin-set adhesive following the general guidelines for applying tile to a wall, and use grout to fill in space between tile and edge of wall. On a new wall, plan the tile installation before finishing the backing so tile will end up flush with finished wall. Name and address tiles are an increasing popular kitchen design choice for both personal and commercial signs. It is recommended that these tiles be installed on a plywood backing. A piece of plywood bolted to a wall is much easier to remove when you move or remodel that are tiles installed directly into the wall. Cut a piece of exterior grade plywood to size and attach it to the wall. Then use standard thin-set adhesive techniques to install tiles. Use an edging tile or wood trim to finish the edge of the plywood. Door frames and windows: Tile can be used very effectively to surround a door or window either indoors or outdoors and anywhere in a kitchen or bath area. It will take the place of an be far more decorative than conventional wood trim pieces. Use bullnose or special tiles called windowsills for decorative sills. Set tiles so that rounded edges face outward. If the wall is also tiled, either set windowsill tiles last so that the finished edge of the sill tile is set on top of the wall tile or start at the window to make sure you do not have to cut frame pieces. Use the same setting materials and techniques for any wall installation. Tabletops: A single tile or field of tiles set into a tabletop is decorative and serves the practical purpose of a built-in trivet. If you are settling individual tiles into a table, you'll have to rout a section of the table surface so that tiles will be flush with tabletop. Attach tiles in the same manner as you would a floor install. If you are covering the entire table with tile, treat the project as an island countertop. Picture: Shielding the area on and around cabinets is just one of the many ways to customize a kitchen. Comments are closed.
|
Remodeling Tip Blog
Archives
June 2024
Recent bathroom and shower articles: Basin Buying Tips | Toilets and Bidets | Shower Choices and Styles | Sink Taps and Fittings | Choosing Flooring & Lights | Flooring tips for bathrooms | Bathroom Wall Tips | Designing With Tile | Dimensioned Stone | Piping Tips | Bathroom Lighting | Learn More About Hiring Bathroom Remodeling Contractors | Bathtub Removal How-To | Japanese Bathroom Tips | Building Contractors vs. Remodeling Contractors | Removing Shower Walls | Mosaic Tile Installation | Cabinet Ideas | Bathroom Fixtures | Tampa Shower Tips | Boston Shower Remodeling | Seattle Shower Remodeling | Sacramento Shower Remodeling | San Antonio Shower Remodeling | San Jose Shower Remodeling |
Indianapolis | Jacksonville | Staten Island Shower Remodeling | Colleyville Kitchen Remodelers | Provo Bathroom Remodeling | Charlotte | Fairview TX Tree Trimming | Categories |

 RSS Feed
