
|
Most of the tools needed for laying out a tile installation are items that you should either have or be able to borrow for the short time you'll need them. The most important layout tool is a jury stick, and that's something you must make for each other.
What You'll Need - Be sure to check the accuracy of all your layout tools before you use them; a crooked straightedge will do you no good at all. Drawing Tools - To make a plan view drawing and to sketch a tile layout on paper, you'll find 1/8 inch graph paper handy, as well as a standard ruler, a pencil and an eraser. Squaring Tools - To check for level and square, you'll need a spirit level and a framing square. An accurate tape measure and a couple of straightedge are necessary for drawing reference lines. The straight-edges, level and square will also be used for tile alignment during tile settling. Plumb Bob - A plumb bob is a small weight attached to the end of a string. If you don't own one and don't wish to buy one, you can make your own. Chalk Line - To mark reference lines for a small installation, you can use straight edges and a pencil or piece of chalk, but for larger areas a chalk line is much more accurate. This tool is merely a length of string housed in a dispenser that contains chalk. Unreel the string, hold it taut, and snap it to leave a chalked line on the setting surface. Jury Stick - A jury stick, also called a story pole or a tile-settling stick, is a homemade ruler marked with tile and joint widths rather than inches and feet. This simple measuring instrument costs practically nothing to make and is an invaluable layout aid. It allows you to lay out your tile installation without having to calculate each dimension or without setting each tile down in place. To make a jury stick, use any piece of straight wood around 9 feet long if possible. You may need more than one jury stick if you are tiling a floor with short and long dimensions or if you are using tiles of more than one size. Medicine cabinets are not the only accessories that may be recessed in the bathroom. It is fairly common to recess toilet tissue holders, soap dishes and even cup holders. Typically, an accessory designed to be recessed is made in two pieces: a brace and a face. Installation for all such items is basically the same.
Tools: Utility knife and keyhole saw, level, plumb line, screwdriver. Supplies: Screws. 1. After you cover the studs with wallboard, use a utility knife to cut a small hole over all dimensions on the outside of the face plate. Be sure you are cutting between the studs, not into them. Insert the brace section into the hole. Hold it in place with your hand as you bring the face plate up to it. Screw the front piece into the brace with the hardware provided by the manufacturer. The screw is designed to draw the brace and the face together, securing your installation. 2. If you want to install ceramic accessories in your tiled wall, simply open a space in the wallboard or mortar bed as you see fit and set the accessory as if it were an ordinary tile. If you want to install a metal dish in the wall, complete your tiling first. Be sure to leave a gap slightly smaller than the accessory and follow step 1 above. 3. If your wall is already opened up for extensive patching or some other reason, you can toenail a 2 by 4 between two studs, and use it as a brace for screws. Few accessories require such bracing, but it is useful for items like horizontal grab bars near the bathroom. As a frame of reference, in a small bathroom a shower may prove to be so much more practical than a tub that you may very well intend to dispose of the larger fixture all together to save space. There are two basic kinds of medicine cabinets, those that hang on the wall, called "surface-mounted" cabinets, and those that are recessed into the wall. The hanging kind comes with installation instructions, but even if it does not, installations generally a matter of measuring where nails or screws should go, drilling a couple of pilot holes, and hanging the unit up. Recessed medicine cabinets are a bit trickier. When you cut the wallboard or plaster and lather in a kitchen or bathroom area, you may encounter wiring, water pipes, vents, structural framing for windows or pocket doors, or heat and air ducts. However, if you do not run into any of these obstacles, installing a recessed medicine cabinet is fairly simple. 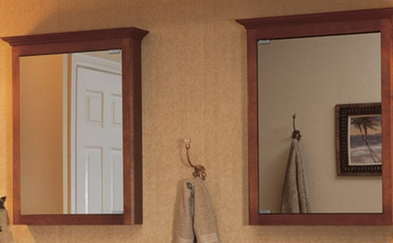
bathroom recessed cabinet example
Studs are placed at 16 or 24 inch intervals, center to center. Thus, the actual space between the studs is 14 inches or 22.5 inches. And these are exactly the widths of many medicine cabinets.
Tools: drill, utility knife, circular, reciprocating, hammer level, plumb line, screwdriver Supplies: common nails, screws, 2 by 4s to size 1. To install a standard-size medicine cabinet, determine where you want to place it, and locate the nearest studs. Measure the unit, and mark the measurements on the wall. Turn off your electricity to avoid cutting hidden live wires and cut out the section. Toenail two sections of 2 by 4 to fit horizontally between the studs and flush with the opening you've cut. 2. To install a larger unit, start by determining where you want to place the cabinets, and locate the studs closes to the outside edge. Measure the unit and add 1/2 inches top and bottom to accomodate 2 by 4 headers. 3. Cut any obstructing studs. Then cut and install the top header. To provide maximum support for the cut stud in a hearing wall, use a double header. Two flat 2 by 4s are sufficient if there is no more than one cut stud to work with. Toenail in place and check with a level. 4. Next, install cripples. Measure the distance from the header to the floor, cut two 2 by 4s to length and nail them to the two outside studs on the wall. 5. Install the bottom support between the cripples. If you're installing a mid-size cabinet, add a filler piece and blocking to create the correctly sized opening for your cabinet. If you're centering the cabinet in the space, follow the procedure for both sides. Install the cabinet according to the manufacturer's instructions, plumb and screw the cabinet, within its frame, hang the doors and install hardware. Then patch the wall. For the most part, removing cabinets is fairly straight-forward work. The only unusual difficulties you are likely to encounter in this remodeling process will come from improperly hung cabinets. The cabinet, the wall, or both may be damaged when you remove the unit. Save the cabinet if you can, but repair the wall with spackeled plaster, or new pieces of wail board Be sure you have removed all fixtures and fittings before you begin.
Tools: screwdriver, prybar. Supplies: spackling compound (for patching damaged wall). 1. Remove any drawers and doors so they won't swing open as you carry the unit away. 2. Remove the countertop (including the basin, if it is a one-piece molded unit). Whether your countertop material is plastic laminate or tile, the surface material is applied to a plywood deck. You want to remove this entire deck, not just the finished surface. You can determine how the deck is attached to the vanity merely by looking up from underneath the countertop. Remove any screws. If the counter top is glued to the base, you may have to pry it off, and some older cabinets may need to be dismantled on the spot. In some older houses where the plumbing has not been modernized, it may be necessary to turn off the main water valve to change a fixture. If this is the case in your house, you need not leave the water turned off completely while you work. After you have turned off the main valve, disconnect the fixture as instructed on our site. Then cap the supply pipes and turn the main water supply back on, so you have water in the rest of the house while you work. Three kinds of caps are in general use: threaded, unthreaded and plastic. All three kinds should be available at your hardware store or home improvement center.
Thread caps fit threaded pipes. Some short iron pipes and connectors are threaded on the inside rather than the outside. These pipes require threaded plus that screw into them. Make sure you buy a cap of the right size - measured by the pipe's inside diameter - and of the same material as the pipe. If you have iron pipes, stay with iron. However, if you have copper, stay with copper. Unless you have a special connection, joining two dissimilar metals will cause corrosion. Some copper pipes are unthreaded and caps must be soldered on. This task requires a large propane torch and a solder flux. Both the fitting and the pipe must be thoroughly clean. If you have little experience soldering, this may be one of several plumbing tasks you want to hire out. Plastic is increasingly common for drainpipes, but it is rarely used for supply lies. If you have any plastic pipe, it will probably be unthreaded. In newer American homes capping the pipes will not be necessary because most modern plumbing fixtures have their own local shutoff valves, also known as angle stops. Those with both hot and cold water faucets have two valves. Angle stops are located uner your washbasin on either side of the large drainpipe. When you turn the faucet-like handle to the right, you close off the water supply to your washbasin. The toilet's single supply valve is located in a similar spot. Before working on any fixtures, close all valves. We have added new cities: San Jose Shower Remodeling Indianapolis Shower Remodeling Jacksonville Shower Remodeling Organic mastic is a material for bonding shower and bath tile that cures by evaporation. This type of adhesive is suitable for installing ceramic tile on interior floors, walls and granite countertops. Organic mastics are purchased premixed; no further addition or liquid or powder additive is needed. There are two basic types of organic mastic. Latex-based mastics contain water; petrochemical-based mastics contain a solvent called toluene. Each type is made up of two components; a bonging agent and a mixing agent.  mastic in action - example Do not use a petrochemical-based mastic to set finished marble; the chemicals will discolor the stone. Latex-based organic mastics and any of the thin-set adhesives can be used with stone tile products. Because organic mastics are premixed, they are the easiest and most commonly used adhesives for residential use and remodeling. they are especially popular for use on walls because they hold tiles as soon as they are set in place, eliminating tile slippage. Mastics can be used in dry installations with plywood, wallboard, plaster, portland-cement mortar, formed concrete and masonry substrates. Not all mastics are compatible with all substrates so check product labels. Organic mastics can be used in properly prepared wet areas, though considerable care should be taken if applying a mastic in a heavily used wet area such as a shower or bath in an area like San Antonio where the climate can add to the project's length of time. Organic mastics are not suitable for use around swimming pools or in exterior remodeling jobs. Check product labels for appropriate uses of individual brands. Despite their ease of use and popularity, organic mastics are inferior to thin-set adhesives in a number of ways. They do not have the bond strength or flexibility of thin-set in most cases. Use caution when performing a remodel job with organic mastics. The vapors in petro-chemical-based mastics are flammable and dangerous when inhaled - take proper precautions and always keep children and pets away from any job site in your home. Mastics are sold in cans. There may be some oil or water floating on the surface when the can is opened for the first time, similar to paint. If the mastic is difficult to stir, it may be too old to use and should be returned. You can store leftover organic mastic in a cool, dark place but it does not keep very well, even in a properly sealed can, so try to purchase only the amount needed to save money. Clean tools and mastic spills as soon as possible, while the mastic is still soft. Hardened mastic is nearly impossible to get off. Remove solvent-based mastic with paint thinner; for water-based mastic, use water. Like other pre-finishes, windows are a transition from the rough frame to the finished house. Made under factory conditions and controls, windows have tighter tolerances than the stud wall construction. As such, before they are nailed in to the rough openings, windows are often shimmed so they fit level, plumb and square in the opening.
If the framing is accurate, there's usually minimal shimming of each window - minor adjustments that align it perfectly in the hole provided. If needed, shims can be installed along any edge and from both sides of the window, with the two tapered edges of each shim meeting in the middle of the window's edge between the unit and the rough opening. Builders or window installers may shim before they caulk the opening. Fastening a window to the frame may occur from the sides of the adjacent framing, or through a factory-applied nailing fin that extends from the edges of the window and is held tight against the outside sheathing to accept nails through to the wall studs. Often, the fin is flashed at the top before the installation of the exterior finish. Once the window is secured to the frame, many builders will remove the sashes or unhinge the glass portion of a casement or sliding window that set them aside, protecting them from damage in a kitchen or bathroom. Contractor lingo - condensation is the formation of water from air-borne moisture on a surface when temperature of that surface is below that of the air. Because it has been linked to an increase in home fires, codes in areas ban the use of aluminum wiring in new construction. But some codes still permit both all-aluminum wire and aluminum wire that is copper-coated. If you are planning for any new wiring, copper wire is the popular choice.
Although more expensive, copper wire is far more safer and convenient. When inspecting your new home, consider the number of electrical outlets, particularly in your new kitchen. Are there enough light switches throughout the house? Correct fuse or circuit breaker size: Electric stove - 50 amps Clothes dryer - 30 amps Water heater - 30 amps Washing machine - 20 amps Dishwasher - 20 amps Furnace - 15 amps A circuit breaker has a tripping mechanism that opens a switch when current exceeds rated amperage. In may respects, a circuit breaker works like a switch of its own. When flow returns to normal, you have to reset it.  entrance to Los Altos, CA area Home to a little under 30,000 people, the city of Los Altos saw dramatic home remodeling growth between 1950 through today, where the city shows no signs of slowing down. The cities name means "the Heights" or "Foothills" in Spanish.
Los Altos has a semi rural atmosphere that the city tries to protect to this day, and many homes reflect this casual yet luxurious lifestyle. Kitchens and bathrooms (and homes in general) often have a rustic, outdoorsy feel vs. a sleek ultra-modern one. Los Altos is a hotbed for Silicon Valley heros to make their home, including the late Steve Jobs, various Google leaders and even Terrance McKenna. Installing individual shakes or shingles can take three to five times as long as installing asphalt fiberglass-based shingles. Two alternative materials are available, however, that can speed up installation. Shakertown's cedar shingles and shakes are bonded with waterproof adhesives to form three ply, 8 foot long panels. The panels do not need sheathing and can be nailed directly to studs. Shakertown two-ply panels can be applied to sheathing or to furring strips. A self-aligning feature and the need for only two nails per panel per rafter speeds the work, and no straight edge or gauges are needed.
Another product that speeds installation is Masonite's fiberboard-panel roofing product, Woodruf, which is manufactured from highly compressed wood fibers. Woodruf comes in 12-48inch panels that are 50 perfect more dense than natural wood and resemble wood shakes when installed. It takes 32 to 36 Woodruf panels to cover 100 square feet. If left uncoated, these panels weather to a natural gray cedar color in most cases. This is a popular home in places like Greenwich and along the coast in Los Altos. |
Remodeling Tip Blog
Archives
March 2023
Recent bathroom and shower articles: Basin Buying Tips | Toilets and Bidets | Shower Choices and Styles | Sink Taps and Fittings | Choosing Flooring & Lights | Flooring tips for bathrooms | Bathroom Wall Tips | Designing With Tile | Dimensioned Stone | Piping Tips | Bathroom Lighting | Learn More About Hiring Bathroom Remodeling Contractors | Bathtub Removal How-To | Japanese Bathroom Tips | Building Contractors vs. Remodeling Contractors | Removing Shower Walls | Mosaic Tile Installation | Cabinet Ideas | Bathroom Fixtures | Tampa Shower Tips | Boston Shower Remodeling | Seattle Shower Remodeling | Sacramento Shower Remodeling | San Antonio Shower Remodeling | San Jose Shower Remodeling |
Indianapolis | Jacksonville | Staten Island Shower Remodeling | Colleyville Kitchen Remodelers | Provo Bathroom Remodeling | Charlotte | Fairview TX Tree Trimming | Categories |
 RSS Feed
